AI Video Editing
Discover how AI video editing uses speech recognition, object detection, tracking, and segmentation to streamline cuts, reframe footage, add captions, and blur people.
AI video editing uses machine learning to help select, arrange, or modify existing footage. Instead of manually locating every speaker, following a moving subject through each frame, or finding each point where one shot ends, an editor can use AI to identify those elements and propose or apply changes. The result may be a rough cut, a reframed clip, captions, or a targeted visual effect. Human judgment still determines whether the edit communicates the intended story accurately.
How AI Video Editing Works#
A video editor works with a timeline of clips, audio, and effects. AI adds information about what happens within that timeline. A system might use speech recognition to turn dialog into time-aligned text, then let an editor find a quote or cut a pause by editing the transcript. Text-based editing in Adobe Premiere illustrates this connection between words and footage.
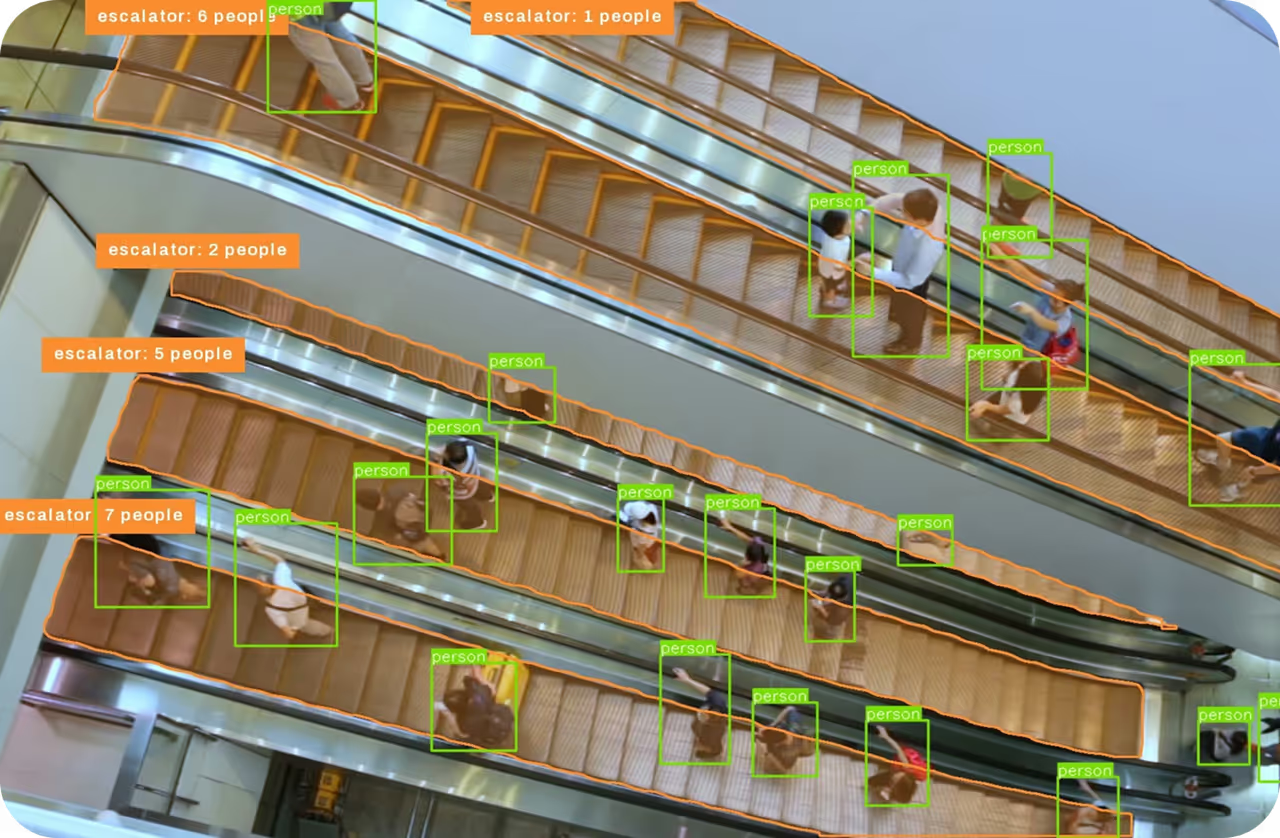
For visual changes, object detection locates subjects in individual frames, often with rectangular bounding boxes. Object tracking associates detections across frames so an effect can follow the same subject as it moves. When an edit needs the subject’s outline rather than a rectangle, instance segmentation supplies a pixel-level mask. Separately, shot change detection can mark transitions between camera shots, making long recordings easier to review.
These techniques contribute different pieces of an edit: detection says where something is, tracking helps establish which object it is over time, and a mask defines which pixels to change. None decides, on its own, which moments belong in the final cut.
How It Differs from Related Terms#
Video understanding describes interpreting a clip’s contents or events; editing uses that interpretation to change how footage is presented. Video generation creates new footage, whereas AI video editing generally begins with footage that already exists. An editor may combine generated material with recorded clips, but the two tasks are not interchangeable.
AI assistance also differs from an ordinary automated edit. A fixed instruction such as “crop every frame to the center” applies the same rule regardless of content. An AI-assisted reframe can respond to where the action moves, as shown in Adobe’s Auto Reframe overview. In both cases, an editor should check that important subjects remain visible.
Two Real-World Applications#
Turning a recorded interview into a short clip. A production team can transcribe an hour of conversation, locate a relevant answer, and build an initial cut around it. Automatic speech-to-text captions provide a starting point for subtitles. The editor then checks the transcript against the audio, adjusts pacing, and confirms that removing nearby remarks has not changed the speaker’s meaning. This is especially important for captions: the W3C guidance on accessible captions notes that automatic output needs accuracy review.
Preparing footage for sharing. A team filming a public event may need to obscure bystanders while keeping the activity visible. A detector can locate people in each frame, and an object-blurring workflow can apply a blur to their detected regions. Editors must inspect the output: a missed detection can leave someone visible, while a large bounding box can obscure more of the scene than intended. Blurring detected people is not the same as reliably anonymizing everyone or identifying faces specifically.
A Practical Video Workflow#
The example below uses Ultralytics YOLO26 to blur detected people in an existing video. Install ultralytics and opencv-python, then place a video named input.mp4 alongside the script.
import cv2
from ultralytics import solutions

capture = cv2.VideoCapture("input.mp4")
assert capture.isOpened(), "Provide an input.mp4 video"

width = int(capture.get(cv2.CAP_PROP_FRAME_WIDTH))
height = int(capture.get(cv2.CAP_PROP_FRAME_HEIGHT))
fps = capture.get(cv2.CAP_PROP_FPS)
writer = cv2.VideoWriter("blurred.mp4", cv2.VideoWriter_fourcc(*"mp4v"), fps, (width, height))
assert writer.isOpened(), "Could not create the output video"

blurrer = solutions.ObjectBlurrer(model="yolo26n.pt", classes=[0])
while True:
    success, frame = capture.read()
    if not success:
        break
    result = blurrer(frame)
    writer.write(result.plot_im)

capture.release()
writer.release()
Class 0 selects people in the pretrained model; it does not select faces. The blurrer processes each frame, while OpenCV’s video capture and writing tools assemble the processed frames into a new file. This short workflow handles video frames, not the original audio track. A complete edit needs an audio-aware finishing step; FFmpeg’s filter documentation covers further video processing options.
What to Check Before Publishing#
Review the entire output, especially cuts, fast motion, occlusions, captions, and the first and last frames of each effect. Preserve an unedited copy so a mistaken cut or incomplete blur can be corrected. For distributed media, Content Credentials and provenance can help document a file’s origin and editing history, but they do not establish whether its message is truthful. AI can accelerate repetitive editing work; the editor remains responsible for context, privacy, and the finished video.